TableView vs CollectionView (ENG)
iOS junior developer’s journal #3
김주희
2018-05-03
Overview
There are several different ways to appear when apps present data to users. Presents it as a list like the settings app, or as a grid like the photos app. The most commonly used view for displaying data is the UITableView or UICollectionView. Depending on the app, you should use the appropriate view because each view has its own characteristics. Because the UI of displaying data could be changeable, you can save the effort to reinvent the app by using the appropriate view. In this article, we will briefly explore each view.
UITableView
A view that displays data in rows arranged in a single column. Only vertical scrolling is possible, and the cell that comprises the individual items in a table is a UITableViewCell object. Table view uses these cell objects to draw rows in the table. Multiple rows can be organized within a section which can have a header and a footer. Sections and rows are distinguished by index number, starting from 0.
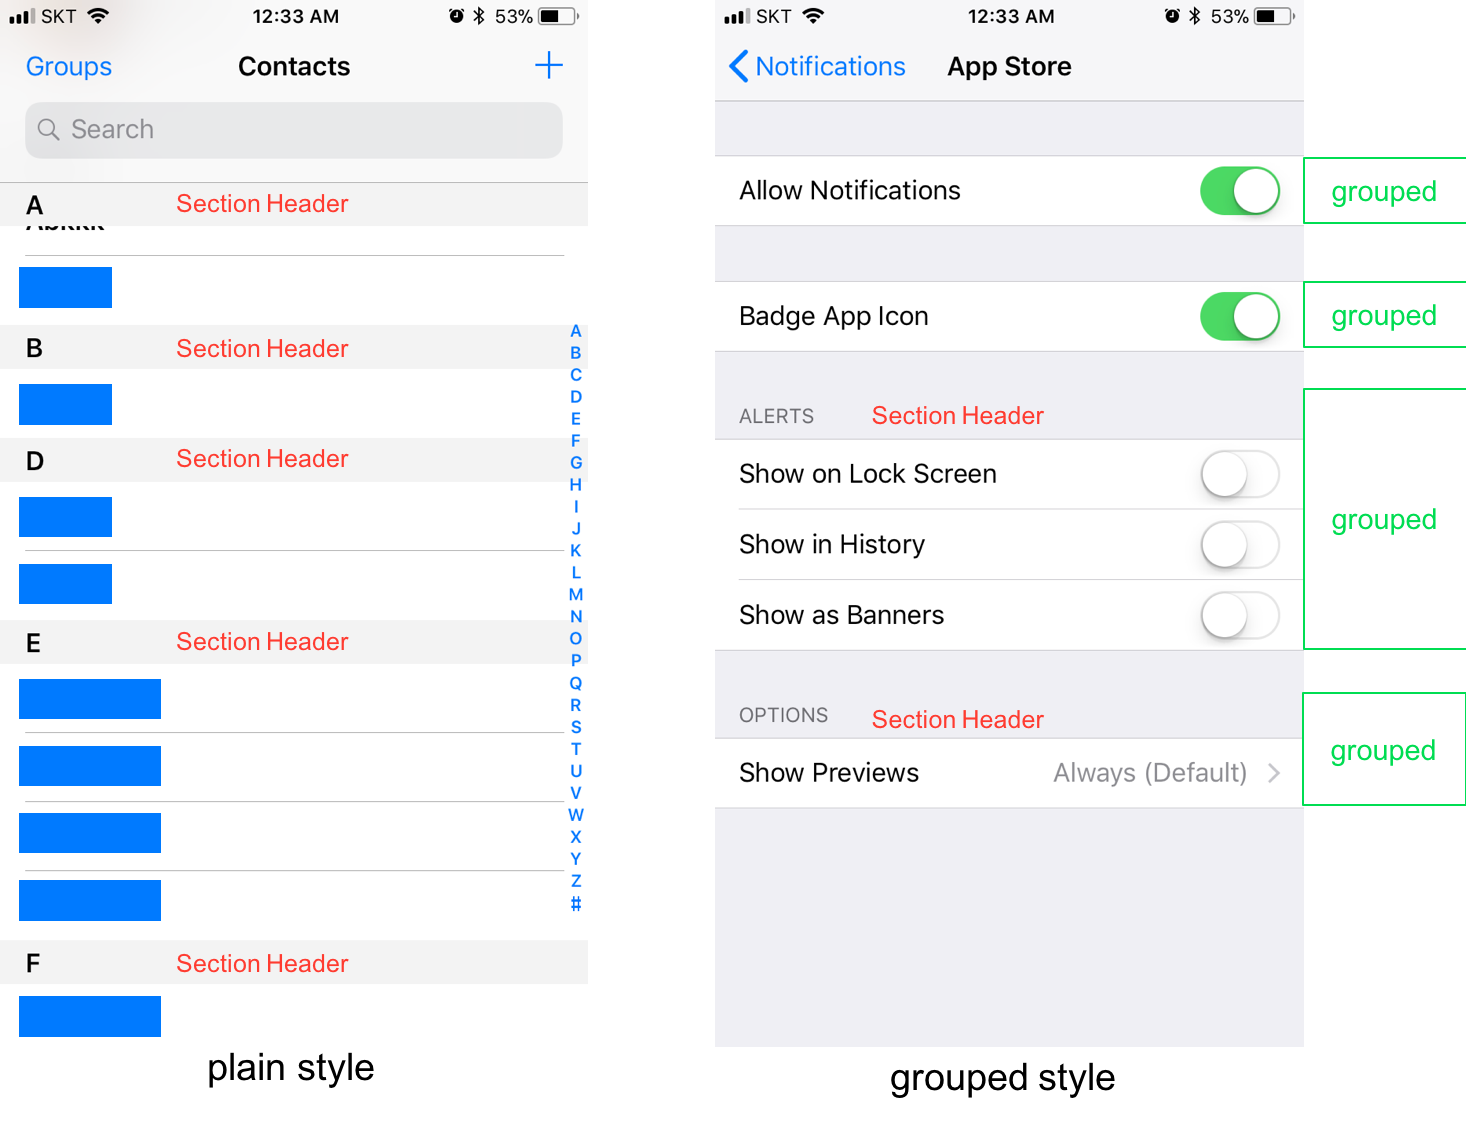
Table view can have one style, either plain or grouped. Plain style is usually a list style. Section’s header and footer is displayed as inline separators and floats above its content when scrolling. Grouped style has a section that shows visually distinct groups of rows. Section’s header and footer does’t float above its contents. Below picture shows the difference of the two styles.
NSIndexPath object are used as parameters and return values in many methods of UITableView. The table view declares the category of the NSIndexPath, making you get the value of the corresponding row’s index and section index. Also, you can construct the index path with row index and section index. Especially with multiple section in the table view, you must have the section index to distinguish the row with row index.
override func tableView(_ tableView: UITableView, cellForRowAt indexPath: IndexPath) -> AttractionTableViewCell {
        // Table view cells are reused and should be dequeued using a cell identifier.
        let cellIdentifier = "AttractionTableViewCell"

        guard let cell = tableView.dequeueReusableCell(withIdentifier: cellIdentifier, for: indexPath) as? AttractionTableViewCell else {
            fatalError("The dequeued cell is not an instance of AttractionTableViewCell.")
        }

        let attraction = attractions[indexPath.row]

        cell.attractionLabel.text = "\(indexPath.row). \(attraction.nameWithDescription)"
        cell.attractionImage.image = attraction.photo
        cell.attractionImage.tag = indexPath.row

        attraction.indexPath = indexPath

        ...

        return cell
    }
The code above is one of the data source’s method which adds cell to the specific locations in the table view. In other words, this method refers to table view creating and returning cells presenting data on a specific row whenever it needs a new cell to display. As a parameter, the indexPath value that is pointing to the row of the required cell object is passed. And then we use the indexPath’s row value as an array index for the array called attractions, to set cell with the data that will display. In here, the attraction array is an array of information about tourist attraction. We are displaying the attractions in order as we use the indexPath row value. Because the indexPath row number and the array index number starts at 0. The example doesn’t have a section index value because it has only one section, but if you have multiple sections you must set the cell using the section index value.
Table view object needs a data source and a delegate. The data source must implement the UITableViewDataSource protocol, and the delegate must implement the UITableViewDelegate protocol. The data source provides the information the table view needs when creating a table, and also manages the data model when the table’s row is added, deleted or rearranged. The delegate is responsible for the appearance and behavior of the screen. For example, the number of the row displaying, when the user touches a particular row, and the reordering of the row.
override func numberOfSections(in tableView: UITableView) -> Int {
        // #warning Incomplete implementation, return the number of sections
        return 1
    }

    override func tableView(_ tableView: UITableView, numberOfRowsInSection section: Int) -> Int {
        // #warning Incomplete implementation, return the number of rows
        return attractions.count
    }
Above code has two function that the data source must implement. One returns the number of sections, and the other returns the number of rows in the section.
The table view has an editing mode which can insert, delete, rearrange rows. Each row can be added, deleted, and rearranged according to the editingStyle associated with the table view cell. For example, if the editingStyle is insert, the inserting function runs, and if the editingStyle is deleted, the deleting function runs. The row’s showsReorderControl property is true, the rearranging function can run.
    override func tableView(_ tableView: UITableView, commit editingStyle: UITableViewCellEditingStyle, forRowAt indexPath: IndexPath) {
        if editingStyle == .delete {
            // Delete the row from the data source
            ...

            // delete rows and attractions and reload datas
            attractions.remove(at: indexPath.row)
            tableView.deleteRows(at: [indexPath], with: .middle)
            tableView.reloadData()
        } else if editingStyle == .insert {
            // Create a new instance of the appropriate class, insert it into the array, and add a new row to the table view
        }
    }
The above source implements the function of deleting cells and reloading the table view when editingStyle is delete.
The easiest and recommended way to create the table view is using UITableViewController on the Storyboard. At runtime, the table view controller creates a table view and assigns the data source and the delegate to itself.
UICollectionView
Collection view can do everything the table view can do. It can have sections, use IndexPath value to distinguish cells. These cells are UICollectionViewCell objects, and the collection view requires the UICollectionViewDataSource and the UICollectionViewDelegate. It can also add, delete, rearrange cells. Then what is the big difference between collection view and table view? It is the layout.
Collection view can represent cells in multiple columns and rows. For example, it can display a list of items in a grid form. So you can scroll horizontally as well as vertically.
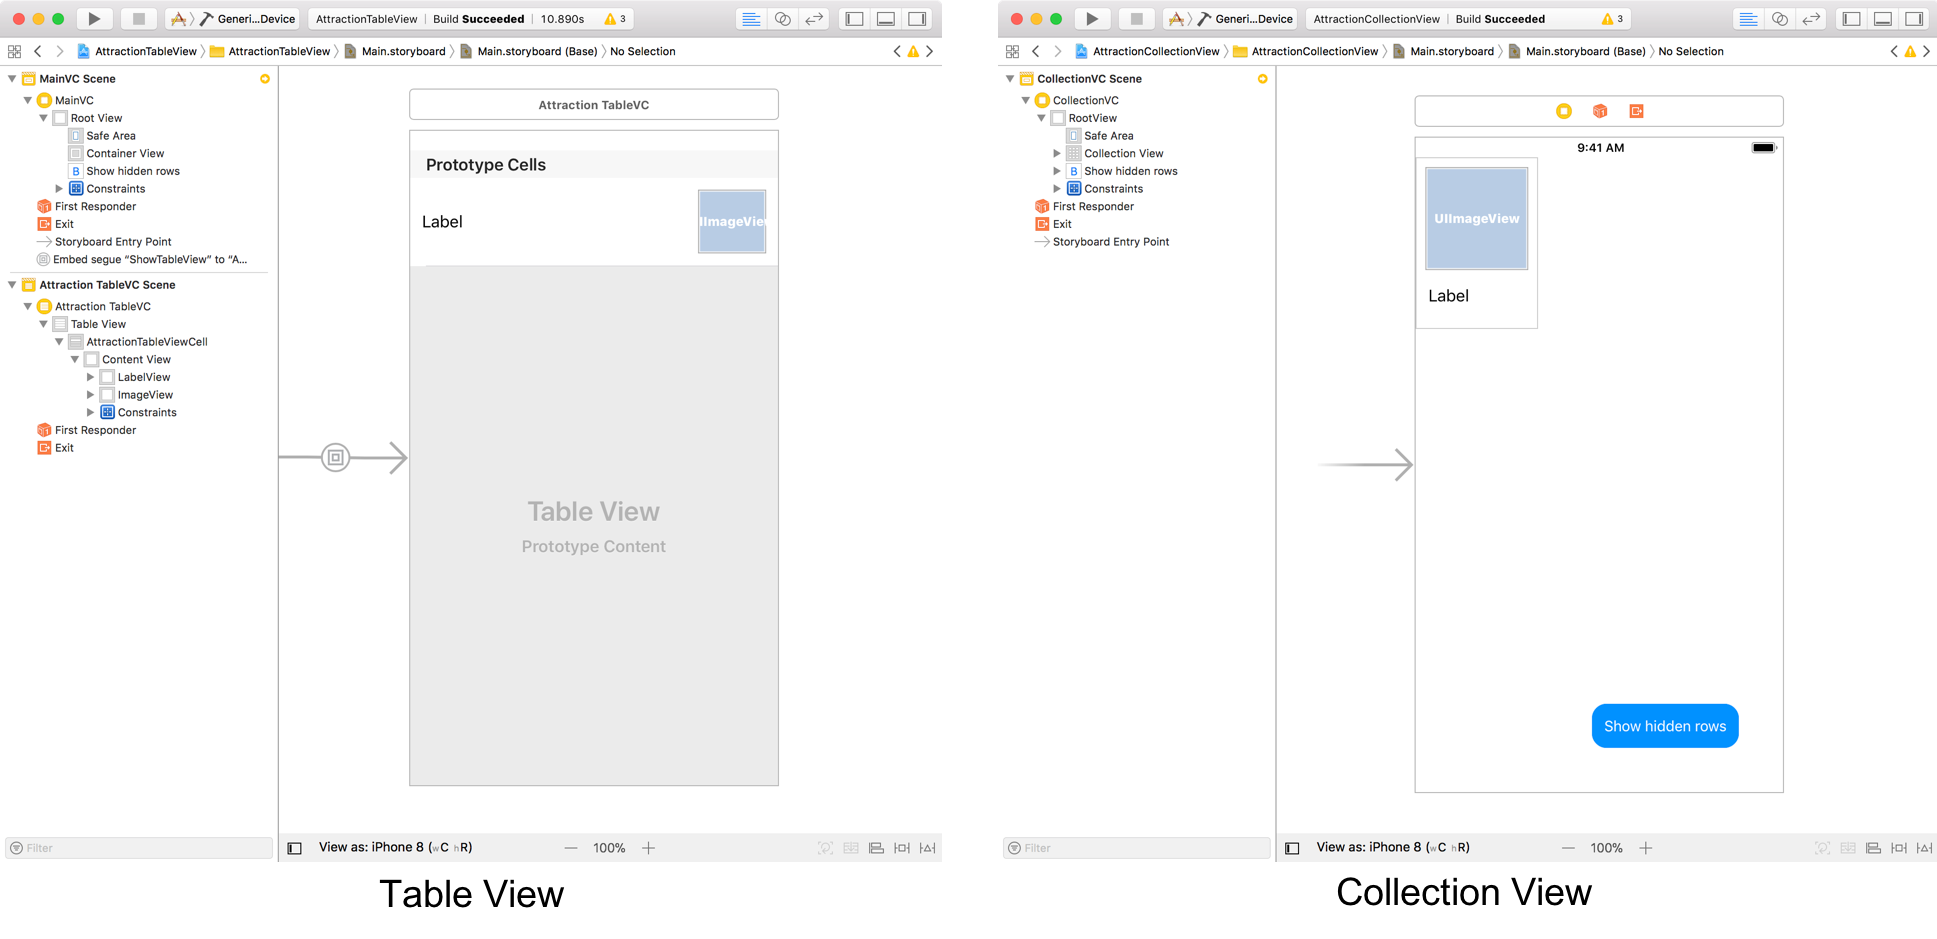
In the screenshot above, the biggest difference between table view and collection view is the cell. Table view presents data in multiple rows arranged in a single column, the cell design is fit as a row. However, collection view can create rows and columns, it can design cells in various ways, even if they are not necessarily rows. It’s also the biggest feature of a collection view cell. The design up above will appear on the app like the screenshot below.

Collection view has also layout object. You can use the existing flow layout, but also you can create a custom layout you want to use. The protocol responsible for this is UICollectionViewDelegateFlowLayout.
func collectionView(_ collectionView: UICollectionView, layout collectionViewLayout: UICollectionViewLayout, sizeForItemAt indexPath: IndexPath) -> CGSize {
        let fullWidth = collectionView.frame.size.width - (self.CGFLOAT_INSET_WIDTH * 3) - (self.CGFLOAT_ITEMSPACING * 3)
        let width = fullWidth/3
        return CGSize(width: width, height: width + self.CGFLOAT_HEIGHT_ATTRACTIONCELL_DEFAULT)
    }

    func collectionView(_ collectionView: UICollectionView, layout collectionViewLayout: UICollectionViewLayout, insetForSectionAt section: Int) -> UIEdgeInsets {
        return UIEdgeInsetsMake(self.CGFLOAT_LINESPACING_VERTICAL, self.CGFLOAT_INSET_WIDTH, self.CGFLOAT_LINESPACING_VERTICAL, self.CGFLOAT_INSET_WIDTH)
    }
From the source above, the collectionView(:layout:sizeForItemAt:) function sets the size of the cell, and collectionView(:layout:insetForSectionAt:) function sets the margin in the section.
You can also create a single view with different shapes of cells. Create a cell specifically to at each section, and these cells will create a single view screen. For example, you can create a cell for each header, menu, body, and footer. And combine these cells to create a view. This way allows you to recycle cells that you use frequently. We can save time and make a much cleaner source by recycling existing cells without having to create the same header and footer cell multiple times.

Like above screenshot, if you have a same view that you need to show on multiple screens, create a xib file for the cell and use that file to set cells in each section in the collection view. By doing this, it is efficient using reusable cell.
Conclusion
We have now looked at the characteristics of table views and collection views. In short, table views can create the simplest list. Collection views can be customized with a wide list of shapes.
So, which one should we choose? The choice depends on how complex the list to implement is. Table views create a simple and universal list. The collection view, on the other hand, can create a list of specific shapes. Therefore, it is recommended to use table views only when the list is simple and there are no design changes. But if the design can change in the future, it would be better to use a collection view.
Simple is the best! For simple implementation, use table view. If it’s hard to implement in a table view, make a list of your own with collection views!
Reference
UITableView - UIKit | Apple Developer Documentation
UICollectionView - UIKit | Apple Developer Documentation
김주희 | MA팀
kimjh3@brandi.co.kr