Vue와 Vuex, 컴포넌트간 통신과 상태 관리
너무 아름다운 다운 다운 다운 Vue
강원우
2018-12-13
편집자 주
Vue 또는 VUE로 혼용하나 공식 사이트의 표기에 맞춰 아래와 같이 통일함
-Vue
-Vuex
-Vue-Router
Overview
최근 브랜디 웹 리뉴얼 TF에 참여해 팀장님과 막내에게 온갖 핍박을 받고 있습니다. 브랜디 웹을 리뉴얼하면서 브랜디 관리자에서 제한된 조건 하에 사용하고 있던 Vue를 마음껏 사용할 수 있게 되었는데요. 휙휙 반응하는 webpack-dev-server를 보면 막힌 체증이 다 내려갈 정도입니다!
점점 복잡해지는 Vue
Vue는 가상 DOM을 활용해 모든 요소를 실시간 반응형 컴포넌트로 제작할 수 있습니다. 여기서 한 가지 문제가 발생하는데요. 프로젝트의 규모가 커질수록 더욱 다양한 형태의 컴포넌트가 생성되고, 컴포넌트의 부모 - 자식 관계는 점점 복잡해진다는 것입니다. 쉽게 예를 들어볼까요?
가족 관계에 접목해보죠. 증손자뻘 되는 컴포넌트가 바로 옆 친척 관계에 있는 다른 증손자뻘 컴포넌트에게 “안녕?”이라고 얘기하려면 먼저 자신의 부모에게 “안녕이라고 말하고 싶어요!” 라고 요청합니다. 그러면 부모 컴포넌트는 또 자신의 부모 컴포넌트에게 “제 자식이 안녕이라고 말하고 싶다네요”라고 말하고, 그럼 그 할아버지 컴포넌트는 또 그 부모에게…. 힘들죠?
그래서 ‘이벤트 버스’라는 개념을 활용합니다. 임의의 VUE 객체를 전역에 생성하거나 혹은 최상위 컴포넌트에 생성해 같은 이벤트 버스를 모든 자식들에게 분배합니다. 그리고 해당 이벤트 버스에 “sayHello” 이벤트를 등록해 “안녕”이라는 메시지를 비교적 간단하게 전달하죠.
다시 예시로 돌아갑시다. 이번엔 바로 옆에 있던 또 다른 증손자격 컴포넌트가 “나도 똑같이 또 다른 증손자격 컴포넌트에게 ‘안녕?’ 이라고 말하고 싶어요!”라고 요청합니다. 그렇게 이벤트 버스 안에 “sayHello1”, “sayHello2”, “sayHello3” 이벤트가 증식하고 인사하는 증손자 컴포넌트가 늘어남에 따라 누가 누구에게 인사했는지 햇갈리기 시작합니다. 결국 나중에는 하나의 컴포넌트가 응답할 것을 기대하고 “sayHello”하고 인사하자 두 개 이상의 서로 다른 증손자격 컴포넌트가 인사를 받아줍니다. 꽤 복잡합니다.
위와 같이 디버깅하기도 어려운 상황을 깔끔하게 처리할 수 있도록 통합 상태 관리 라이브러리가 필요하였고, 그렇게 즉각 반응형의 상태(state)를 가진 상태관리패턴 + 라이브러리인 Vuex가 세상에 나왔습니다. 아래 이미지는 Vuex를 잘 나타내는 다이어그램입니다.
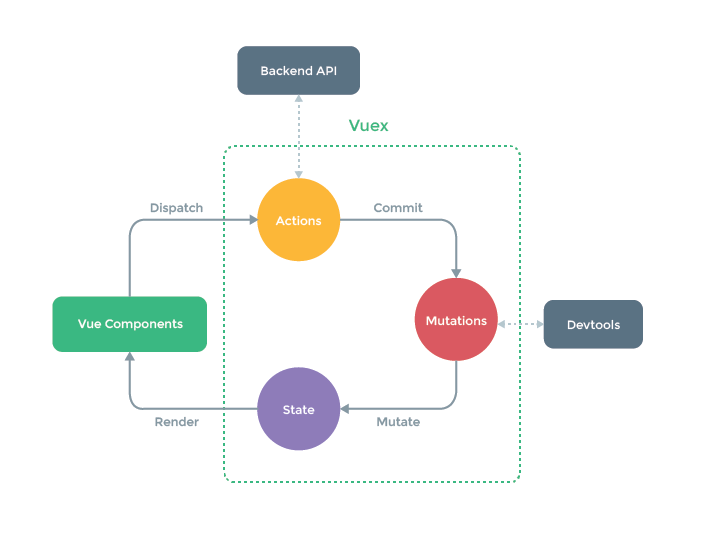
Vuex의 요소는 다음과 같습니다.
1. Dispatch()
- Vue컴포넌트는 Dispatch(‘[action메소드명]’)를 통해 Vuex store의 Action 그룹에 속한 메서드를 실행시킬 수 있습니다.
2. Actions - API서버 통신과 같은 역할을 수행하는 메소드 그룹입니다.
- 주로 state에 반영하기 전 데이터를 조회하고 가공하는 역할을 수행합니다.
3. Commit() - Action메소드 혹은 Vue컴포넌트에서 Commit(‘[mutation메소드명]’)을 통해 Mutation 그룹에 속한 메서드를 실행할 수 있습니다.
- 컴포넌트에서는 $store.commit(), Actions 메소드에서는 첫번째 인자로 넘겨받는 context.commit()으로 트리거시킵니다.
4. Mutations - Vuex store의 상태(state)를 변경시키기 위한 메서드 집합입니다.
- Vuex는 state의 조작은 오로지 Mutation의 메소드를 통해 수행하길 권장합니다.
- 따로 mutate 메서드는 없고, 첫 번째 인자로 받는 state.[state요소]로 수정합니다.
5. state - 사용자가 정의한 상태를 저장합니다
- 즉각반응형이기 때문에 v-model 의 computed 메서드중 get()이 선언되어 있다면 즉각적으로 반응합니다.
- Vue컴포넌트의 watch처럼 $store.watch로 변화를 감지하고 핸들링할 수 있습니다.
6. getters - 여러 컴포넌트에서 동일한 computed를 통해 하나의 state를 가져와야 한다면 Vuex store에 getters를 등록하여 computed처럼 활용할 수 있습니다.
- 첫 번째 인자로 state를 받습니다.
7. modules - 하나의 스토어만을 사용해 모든 Dispatch, Commit을 처리한다면 전역 이벤트 버스와 다를 것이 없습니다.
- 따라서 각 목적에 맞는 항목을 module로 분리할 수 있고 namespaced속성을 true로 설정하여 각 모듈의 이름을 포함한 Dispatch, Commit, state조회 등을 수행할 수 있습니다.
이번 글에서는 Vue의 상태를 통합 관리해주는 Vuex와 Vuex가 없을 때의 통신 방식에 대해 예제로 알아보겠습니다.
프로젝트
- 프로젝트 생성
npm과 라이브러리 설치는 PHP Codeigniter 환경에서 Vue 사용해보기에서도 자세히 언급했지만, webpack-dev-server를 통해 실행했더니 bebel 관련 에러가 뜹니다. 무슨 문제라도 있는 걸까요? 먼저 babel-loader를 확인해보겠습니다.
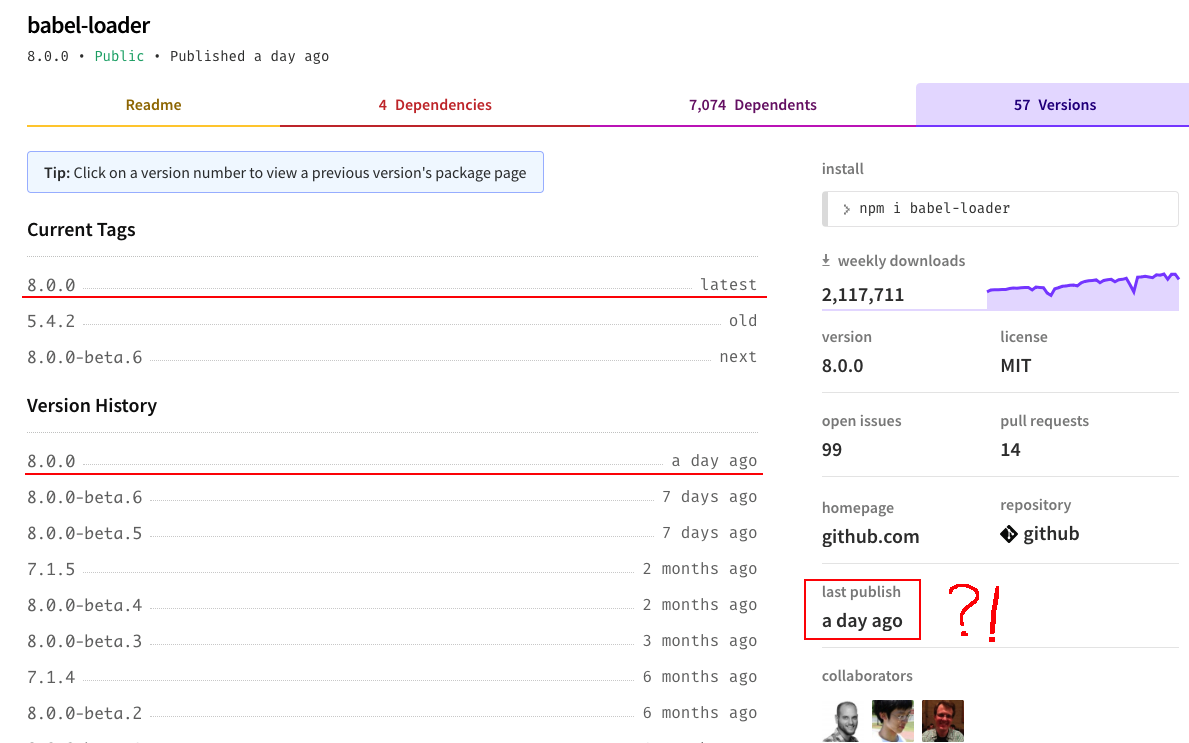
이렇게 또 한 번 하루가 다르게 변해가는 개발자의 삶을 느껴봅니다. Readme를 살펴보니 babel-loader 8.0 버전 이상에서는 babel-core가 아닌 @babel/core를 사용해야 하고, preset도 babel-preset-env에서 @babel/preset-env으로 바뀌었습니다. 아마도 바벨 관련 플러그인이 늘어나다 보니 npm-scope를 이용해 하나로 묶어버린 것 같습니다. npm-scope에 대한 자세한 내용은 여기를 클릭하세요.
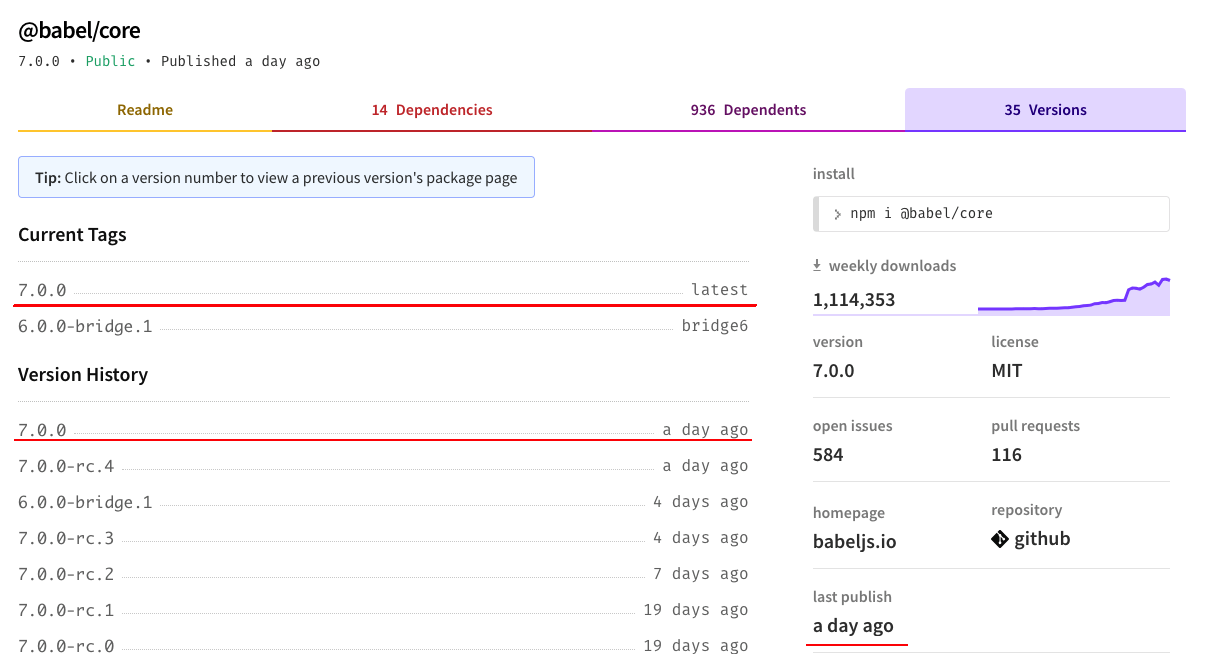
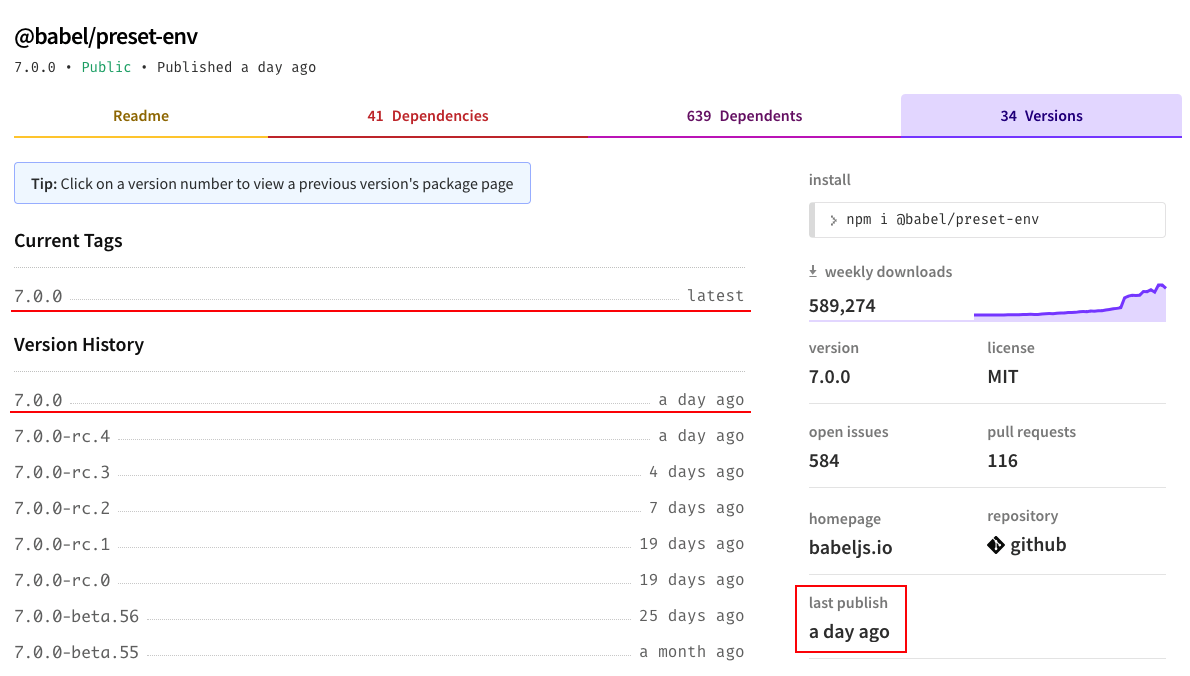
babel/core와 babel/preset도 확인해봅니다.
기왕 이렇게 된 거 전부 새것으로 교체해보겠습니다. 실무에서 쓰기 힘든 신버전은 이럴 때 써야죠. 그리고 이번 글에선 CI 환경에 결합해야 하는 상황이 아니기 때문에 webpack-dev-server를 통해 빠르게 진행하겠습니다.
- 프로젝트 초기화
폴더를 생성하고, npm init을 통해 프로젝트를 생성합니다.
npm init - 라이브러리, 플러그인 설치
필요한 라이브러리와 플러그인을 설치합니다.
npm install -S vue vue-router vuex
npm install -D vue-loader vue-template-compiler
npm install -D webpack webpack-cli webpack-dev-server
npm install -D babel-loader @babel/core @babel/preset-env
npm install -D html-webpack-plugin css-loader vue-style-loader
지난 글과 다르게 이번에는 webpack-dev-server에서 화면과 기능을 확인해야 하기 떄문에 Vue와 html플러그인. css로더, 스타일로더 등도 함께 설치합니다.
- 생성된 package.json에 스크립트 추가
[package.json]
경로 : /[패키지루트]
{
  "name": "vue-and-vuex",
  "version": "1.0.0",
  "description": "Vue와 Vuex에 관한 프로젝트",
  "scripts": {
 "dev": "webpack-dev-server --mode development --port 80"
  },
  "author": "WonwooKang",
  "license": "ISC",
  "devDependencies": {
 "@babel/core": "^7.0.0",
 "@babel/preset-env": "^7.0.0",
 "babel-loader": "^8.0.0",
 "css-loader": "^1.0.0",
 "html-webpack-plugin": "^3.2.0",
 "vue-loader": "^15.4.1",
 "vue-style-loader": "^4.1.2",
 "vue-template-compiler": "^2.5.17",
 "webpack": "^4.17.1",
 "webpack-cli": "^3.1.0",
 "webpack-dev-server": "^3.1.6"
  },
  "dependencies": {
 "vue": "^2.5.17",
 "vue-router": "^3.0.1",
 "vuex": "^3.0.1"
  }
}
npm run dev 를통해 webpack-dev-server로 실행할 수 있도록 스크립트를 추가했습니다.
웹펙 기본 설정과 테스트 소스 작성
몇 가지 주의할 것이 있습니다.
주의사항
-
Vue용 커스텀 태그와 components는 케밥 케이스 - 캐멀케이스 자동치환됩니다. ex) hello-world = HelloWorld
-
babel을 사용할 경우, ”Hello: Hello”같은 구문은 “Hello” 로 축약 가능합니다. ex) new Router({ routes: routes }) = new Router({ routes })
-
babel을 통한 es6 이상 스크립트에서 세미콜론(;) 은 필수가 아닙니다.
-
화살표 함수는 내부적으로 this를 가지지 않기 때문에 Scope에 주의해야 합니다.
1.웹팩 기본 설정
새로운 바벨에 맞도록 설정하며 파일을 작성합니다. .babelrc 파일은 따로 작성하지 않고 webpack.config.js에 포함시켰습니다.
[webpack.config.js]
경로 : /webpack.config.js
const { VueLoaderPlugin } = require('vue-loader');
const HtmlWebpackPlugin = require('html-webpack-plugin');

module.exports = {
    entry: {
        app: './src/main.js'
    },
    output: {
        path: __dirname + '/dist',
        filename: '[name].js'
    },
    devServer: {
        historyApiFallback: true,
    },
    module: {
        rules: [
            {
                test: /\.vue$/,
                loader: 'vue-loader',
            },
            {
                test: /\.js$/,
                use: {
                    loader: 'babel-loader',
                    options: {
                        presets: [
                            [
                                '@babel/preset-env',
                                {
                                    targets: {
                                        chrome: '58',
                                        ie: '9'
                                    }
                                }
                            ]
                        ],
                    }
                }
            },
            {
                test: /\.css$/,
                use: ['vue-style-loader', 'css-loader']
            }
        ]
    },

    resolve: {
        alias: {
            'vue$':'vue/dist/vue.esm.js'
        }
    },

    plugins: [
        new VueLoaderPlugin(),
        new HtmlWebpackPlugin({
            filename: 'index.html',
            template: './src/index.html',
            inject: true
        }),
    ]
}
-
@babel/preset-env 의 타겟을 설정합니다.
-
예제 진행에 필요한 vue-style-loader, html-webpack-plugin 등도 설정합니다.
-
webpack-dev-server가 REST 요청을 받을 수 있도록 devServer에 historyApiFallback 설정도 추가합니다.
-
만약 historyApiFallback 설정이 없다면 루트(/) url을 제외한 url은 Cannot GET /[하위경로] 에러를 만나게 됩니다.
-
HtmlWebpackPlugin의 inject: true옵션을 통해 main.js를 주입합니다.
2.루트파일 작성
[index.html]
경로 : /src/index.html
어플리케이션의 시작파일입니다. main.js와 Vue-Router를 통해 <div id="app"> 과 <router-view>가 치환됩니다.
<!doctype html>
<html lang="ko">
<head>
    <meta charset="UTF-8">
    <meta name="viewport"
          content="width=device-width, user-scalable=no, initial-scale=1.0, maximum-scale=1.0, minimum-scale=1.0">
    <meta http-equiv="X-UA-Compatible" content="ie=edge">
    <title>Vue와 Vuex!</title>
</head>
<body>
    <!-- VUE inject -->
    <div id="app">
        <router-view/>
    </div>
</body>
</html>
[main.js]
경로 : /src/main.js
어플리케이션의 시작점이 되는 main.js입니다. 예제를 진행하면서 계속 변화하는 파일입니다.
import Vue from 'vue'
import VueRouter from 'vue-router'

//컴포넌트 임포트
import HelloWorld from './components/helloworld/HelloWorld.vue'

//라우터 사용처리
Vue.use(VueRouter)

//url과 컴포넌트 매핑
const routes = [
    { path: '/helloWorld', component: HelloWorld },
]

//라우터 생성
const router = new VueRouter({
    mode: 'history',
    routes
})

//기본 뷰객체에 라우터 등록
new Vue({
    el: "#app",
    router,
})
이번 글에서는 Vue-Router가 사용되지만 Vuex가 주제이므로 Router는 간단하게 다루고, 다음에 더욱 자세히 다루겠습니다.
Vue-Router 플러그인을 사용하기 위해 Vue.use() 메서드를 호출하고, 접속 url과 컴포넌트 목록인 routes를 작성하여 Vue-Router 객체를 생성합니다. 그리고 최상위의 컴포넌트인 Vue 객체에 등록합니다.
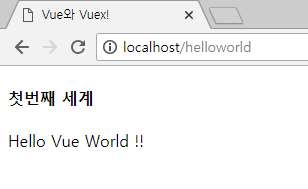
3.기본 테스트코드 helloworld 작성
[HelloWorld.vue]
경로 : /src/components/helloworld/HelloWorld.vue
<template>
    <div>
        <h4>첫번째 세계</h4>
        <hello/> Vue <world/> !!
    </div>
</template>
<script>
    import Hello from './Hello.vue'
    import World from './World.vue'

    export default {
        name: 'HelloWorld',
        components: { Hello, World }
    }
</script>
[Hello.vue]
경로 : /src/components/helloworld/Hello.vue
<template>
    <span>Hello</span>
</template>

<script>
    export default {
        name: "Hello",
    }
</script>
[World.vue]
경로 : /src/components/helloworld/World.vue
<template>
    <span>World</span>
</template>

<script>
    export default {
        name: "World",
    }
</script>
테스트용 코드이기 때문에 다른 건 없습니다.
4.테스트 환경 확인
기나긴 테스트 준비가 끝났습니다. 이제 본격적으로 컴포넌트의 통신과 Vuex의 관해 알아봅시다.
Vue의 컴포넌트간 통신 방식
Vue의 컴포넌트간 통신 방식은 위에서 말했듯이 아래와 같은데요. 각각의 방식을 HelloWorld를 통해 알아보겠습니다.
1) 상위 컴포넌트를 통한 이벤트 처리
2) 이벤트 버스
3) Vuex store 상태 관리
1.상위 컴포넌트 이벤트 처리를 활용한 HelloWorld
첫 번째 통신 방법인 상위 컴포넌트를 통한 이벤트 처리입니다.
[main.js]
경로 : /src/main.js
import Vue from 'vue'
import VueRouter from 'vue-router'

//컴포넌트 임포트
import HelloWorld from './components/helloworld/HelloWorld.vue'
import HelloWorld2 from './components/helloworld_with_parentcall/HelloWorld.vue'

//라우터 사용처리
Vue.use(VueRouter)

//url과 컴포넌트 매핑
const routes = [
    { path: '/helloWorld', component: HelloWorld },
    { path: '/helloWorld2', component: HelloWorld2 },
]

//라우터 생성
const router = new VueRouter({
    mode: 'history',
    routes
})

//기본 뷰객체에 라우터 등록
new Vue({
    el: "#app",
    router,
})
main.js에 두 번째 HelloWorld를 등록합니다.
[HelloWorld.vue]
경로 : /src/components/helloworld_with_parentcall/HelloWorld.vue
<template>
    <div>
        <h4>두번째 세계</h4>
        <!-- 컴포넌트에 이벤트핸들러를 등록하고,  -->
        <hello/> Vue <world/> !!
    </div>
</template>

<script>
    import Hello from './Hello.vue'
    import World from './World.vue'

    //이 컴포넌트 객체를 통해 통신하지만 추가되는것은 없다.
    export default {
        name: "HelloWorld2",
        components: {Hello, World},
    }
</script>
하위 컴포넌트에 v-on 혹은 @태그로 이벤트를 수신해 처리할 수 있지만 간단하게 $parent 객체를 사용합니다. 그러므로 HelloWorld.vue로 이벤트를 주고 받더라도 실제 HelloWorld.vue에 추가되는 코드는 없습니다.
[Hello.vue]
경로 : /src/components/helloworld_with_parentcall/Hello.vue
<template>
    <span>Hello</span>
</template>

<script>
    export default {
        name: "Hello",
        //생성시점에 이벤트 버스를 통해 이벤트 발생시킴
        created: function() {

            //여기서 익명함수 function(){}으로 이벤트를 등록할 경우
            // this가 window를 가르키기 때문에 this를 사용하려면
            // let thisClass = this 와같은 방법으로 뷰컴포넌트 객체를 넘겨주어야함
            //상위 컴포넌트를 통해 이벤트를 발생시킨다.
            let emmitEvent = () => {
                this.$parent.$emit('setWorldText', 'world')
            }

            setTimeout(emmitEvent, 1000)
        }
    }
</script>
[World.vue]
경로 : /src/components/helloworld_with_parentcall/World.vue
<template>
    <span></span>
</template>

<script>
    export default {
        name: "World",
        data: () => {
          return { world: '임시 세계' }
        },
        //생성시점에 이벤트 버스에 이벤트핸들러 등록
        created: function() {
            // 여기도 function() 익명함수의 this는 $parent를 가르키게 된다
            //상위 컴포넌트에 이벤트핸들러를 등록하여 해당 이벤트를 처리한다.
            this.$parent.$on('setWorldText', text => {
                this.world = text
            })
        }
    }
</script>
위 웹펙 기본 설정과 테스트 소스 작성의 주의사항과 주석에도 표기했듯이 화살표 함수 (=>)와 익명함수 (function()) 는 this의 유무로 그 차이를 구별합니다. 정확하게는 익명함수의 경우 자신이 속한 객체를 this로 가집니다. 하지만 화살표 함수는 this를 가지지 않기 때문에 화살표 함수 내부에서 this를 호출할 경우 undefined가 나타나거나, 그보다 상위에서 선언된 this를 가져오게 됩니다.
두 번째 HelloWorld의 경우에도 화살표 함수의 경우 this를 가지지 않기 때문에 가장 마지막에 존재한 this인 현재 컴포넌트가 반환됩니다. Hello.vue에서 $parent.$emit를 통해 자신의 상위 객체에 이벤트를 트리거시키고, World.vue에서 $parent.$on을 통해 이벤트를 핸들링합니다. 트리거 시점이 핸들링 메서드가 등록된 이후여야 하므로 타임아웃을 걸어줍니다. 결과는 아래와 같습니다.
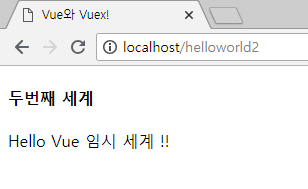

호출과 핸들링 모두 잘 됩니다.
2.이벤트 버스를 통해 HelloWorld 제작해보기
이벤트 버스를 통한 이벤트 처리입니다. 전역 이벤트 버스를 선언하는 방법이 더 간단하지만 상위객체의 로컬 이벤트 버스를 선언해 props로 넘겨 처리하는 방식으로 작성해보았습니다.
[main.js]
경로 : /src/main.js
import Vue from 'vue'
import VueRouter from 'vue-router'

//컴포넌트 임포트
import HelloWorld from './components/helloworld/HelloWorld.vue'
import HelloWorld2 from './components/helloworld_with_parentcall/HelloWorld.vue'
import HelloWorld3 from './components/helloworld_with_eventbus/HelloWorld.vue'

//라우터 사용처리
Vue.use(VueRouter)

//url과 컴포넌트 매핑
const routes = [
    { path: '/helloWorld', component: HelloWorld },
    { path: '/helloWorld2', component: HelloWorld2 },
    { path: '/helloWorld3', component: HelloWorld3 },
]

//라우터 생성
const router = new VueRouter({
    mode: 'history',
    routes
})

//기본 뷰객체에 라우터 등록
new Vue({
    el: "#app",
    router,
})
[HelloWorld]
경로 : /src/components/helloworld_with_eventbus/HelloWorld.vue
<template>
    <div>
        <h4>세번째 세계</h4>
        <!-- 각 컴포넌트에 이벤트 버스를 넘겨준다 -->
        <hello :eventBus="eventBus"/> Vue <world :eventBus="eventBus"/> !!
    </div>
</template>

<script>
    import Vue from 'vue'
    import Hello from './Hello.vue'
    import World from './World.vue'

    //HelloWorld2.vue 에서 eventBus가 추가됨
    export default {
        name: "HelloWorld3",
        data: () => {
            return {
                eventBus: new Vue()
            }
        },
        components: {Hello, World},
    }
</script>
[Hello]
경로 : /src/components/helloworld_with_eventbus/Hello.vue
<template>
    <span>Hello</span>
</template>

<script>
    export default {
        name: "Hello",
        props: { eventBus: Object },
        //생성시점에 이벤트 버스를 통해 이벤트 발생시킴
        created: function() {

            //여기서 익명함수 function(){}으로 이벤트를 등록할 경우
            // this가 window를 가르키기 때문에
            // let thisClass = this 와같은 방법으로 뷰컴포넌트 객체를 넘겨주어야함
 // 이벤트 버스를 통해 이벤트를 발생시킨다.
            let emmitEvent = () => {
                this.eventBus.$emit('setWorld', 'world')
            }

            setTimeout(emmitEvent, 1000)
        }
    }
</script>
[World]
경로 : /src/components/helloworld_with_eventbus/World.vue
<template>
    <span></span>
</template>

<script>
    export default {
        name: "World",
        data: () => {
          return { world: '임시 세계' }
        },
        props: { eventBus: Object },
        //생성시점에 이벤트 버스에 이벤트핸들러 등록
        created: function() {
            //여기서 익명함수 funciton(text){}로 이벤트핸들링시 this가 현제 뷰컴포넌트객체가 아닌
            //이벤트버스 뷰 객체를 가르키게 되므로 this가 없는 화살표 함수를 사용하거나
            // let thisClass = this 를 통해 뷰컴포넌트 객체를 가져와줘야 함
 //이벤트 버스에 리스너를 등록하여 이벤트를 처리한다.
            this.eventBus.$on('setWorld', text => {
                this.world = text
            })
        }
    }
</script>
이벤트 버스 방식에서도 화살표 함수와 익명함수를 주의하며 작성합니다. 이벤트 버스 방식도 상위 객체를 이용한 방식과 별반 다르지 않습니다. 왜냐하면 이벤트 버스용 객체 또한 new Vue()를 통해 생성한 Vue 객체이기 때문에 이벤트를 발생시키는 방법에 있어서는 똑같이 emit()을 사용합니다. 차이점이라 한다면 전역으로 선언했을 경우 컴포넌트에 독립적으로 사용할 수있다는 것입니다.
하지만, 전역 이벤트 버스를 사용하는 프로젝트의 규모가 커지면 커질수록 의도하지 않은 이벤트 구독 핸들러를 호출할 확률이 증가하고, 이는 디버깅 난이도를 증가시킬 수 있기 때문에 좋은 방법은 아니라고 생각합니다. 결과는 아래와 같습니다.
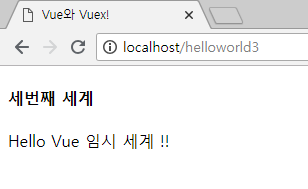
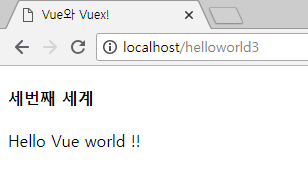
이벤트 버스를 통해서도 작동이 잘 됩니다.
3.Vuex store 상태 관리를 통한 HelloWorld 작성
오래 기다리셨습니다. 드디어 Vuex를 사용한 HelloWorld 입니다!
[main.js]
경로 : /src/main.js
import Vue from 'vue'
import VueRouter from 'vue-router'
import Vuex from 'vuex'

//컴포넌트 임포트
import HelloWorld from './components/helloworld/HelloWorld.vue'
import HelloWorld2 from './components/helloworld_with_parentcall/HelloWorld.vue'
import HelloWorld3 from './components/helloworld_with_eventbus/HelloWorld.vue'
import HelloWorld4 from './components/helloworld_with_store/HelloWorld.vue'

//라우터 사용처리
Vue.use(VueRouter)

//url과 컴포넌트 매핑
const routes = [
    { path: '/helloWorld', component: HelloWorld },
    { path: '/helloWorld2', component: HelloWorld2 },
    { path: '/helloWorld3', component: HelloWorld3 },
    { path: '/helloWorld4', component: HelloWorld4 },
]

//라우터 생성
const router = new VueRouter({
    mode: 'history',
    routes
})

//VUEX 사용처리
Vue.use(Vuex)

//VUEX 스토어 생성
const store = new Vuex.Store({
    state: {
        world: '임시 세계'
    },
    mutations: {
        setWorld: function(state, data){
            state.world = data
        }
    },
    actions: {
    },
})

//기본 뷰객체에 라우터와 스토어 등록
new Vue({
    el: "#app",
    router,
    store,
})
main.js에도 큰 변화가 일어났습니다. Vuex 플러그인을 use 함수로 사용 처리하고, Vue store를 만들어 최상위 Vue 객체에 등록합니다.
[HelloWorld.vue]
경로 : src/components/helloworld_with_store/HelloWorld.vue
<template>
<div>
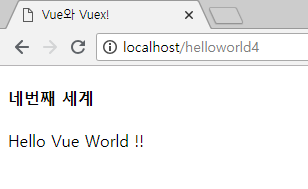
<h4>네번째 세계</h4>
<hello/> Vue <world/> !!
</div>
</template>
<script>
import Hello from './Hello.vue'
import World from './World.vue'
//구조는 HelloWorld.vue와 동알하다
export default {
name: "HelloWorld4",
components: {Hello, World},
}
</script>
Vuex를 사용한 HelloWorld.vue는 다시 최초의 HelloWorld.vue와 같습니다.
[Hello.vue]
경로 : src/components/helloworld_with_store/Hello.vue
<template>
    <span>Hello</span>
</template>

<script>
    export default {
        name: "Hello",

        //생성시점에 데이터 세팅
        created: function() {
            this.$store.commit('setWorld', 'World')
        }
    }
</script>
생성할 때 호출되는 created 메서드에서 commit을 통해 main.js에 생성되어 있는 setWorld state를 ‘임시 세계’에서 ‘World’로 변경합니다.
[World.vue]
경로 : src/components/helloworld_with_store/World.vue
<template>
    <span></span>
</template>

<script>
    export default {
        name: "World",

        //컴퓨트 속성으로 store에서 world 가져오기
        computed: {
            world: function(){
                return this.$store.state.world
            }
        }
    }
</script>
computed 속성으로 참조해주기만 하면 끝입니다.
Vuex의 mutation을 통한 state의 변경은 즉시 반응형이기 때문에 watch를 등록할 필요도 없고, 호출 시점에 대한 고민, eventName 작명 고민 이벤트 중첩에 대한 걱정까지도 필요 없습니다! 지금까지의 예제는 비교적 간단했기 때문에 Vuex의 장점이 잘 안 보였을 수도 있습니다. 더 복잡한 예제를 작성할 건데요. 그 전에 지금까지의 예제를 진행하며 복잡해진 main.js를 우선 정리하겠습니다.
현재는 어플리케이션의 진입점 역할인 main.js에 라우터 기능과 Vuex store 기능이 모두 집약되어 있습니다. Vuex와 Vue-Router를 분리해봅시다.
4.번외편! Vue-Router와 Vuex store를 별도 파일로 분리하기
import를 할 때 js파일명을 지정하지 않으면 자동으로 index.js를 읽는 것과 Vuex store의 modules를 사용해서 분리합니다.
라우터 분리
[router/index.js]
경로 : /router/index.js
import Vue from 'vue'
import Router from 'vue-router'

//컴포넌트 임포트
import HelloWorld from '../src/components/helloworld/HelloWorld.vue'
import HelloWorld2 from '../src/components/helloworld_with_parentcall/HelloWorld.vue'
import HelloWorld3 from '../src/components/helloworld_with_eventbus/HelloWorld.vue'
import HelloWorld4 from '../src/components/helloworld_with_store/HelloWorld.vue'

//라우터 사용처리
Vue.use(Router)

//url과 컴포넌트 매핑 name은 router.push() 메서드 사용시 필요하다.
const routes = [
    {
        path: '/helloworld',
        name: 'HelloWorld',
        component: HelloWorld
    },
    {
        path: '/helloworld2',
        name: 'HelloWorld2',
        component: HelloWorld2
    },
    {
        path: '/helloworld3',
        name: 'HelloWorld3',
        component: HelloWorld3
    },
    {
        path: '/helloworld4',
        name: 'HelloWorld4',
        component: HelloWorld4
    }
]

//라우터 생성
const router = new Router({
    mode: 'history',
    routes
})

//라우터 배포
export default router
앞에서 없던 name 옵션이 추가되었습니다. router의 name속성은 router.push()를 통해 이동할 때 사용하는 속성입니다. 이 내용도 Vue-Router를 살펴볼 때 다루겠습니다.
[vuex/store.js]
경로 : /vuex/store.js
import Vue from 'vue'
import Vuex from 'vuex'

// 모든모듈 modules로 임포트
import * as modules from './modules'

//VUEX 사용처리
Vue.use(Vuex)

//VUEX 스토어 생성
const store = new Vuex.Store({
    //전역 상태로 사용할것이 있다면 이곳에 추가
    state: {
    },
    mutations: {
    },
    actions: {
    },
    modules: modules.default
})

//스토어 배포
export default store
모듈도 각각 분리해 modules로 등록했습니다. 매우 깔끔해졌습니다. 이곳(store.js)의 state, mutations, actions들도 사용할 수 있습니다. 공통적으로 처리해야 할 state가 있다면 이곳에서 처리합니다.
[modules/index.js]
경로 : /vuex/modules/index.js
const files = require.context('.', false, /\.js$/)
const modules = {}

//index.js를 제외한 모든 js를 file명을 키로 modules에 담아 리턴
files.keys().forEach((key) => {
    if (key === './index.js') return
    modules[key.toLowerCase().replace(/(\.\/|\.js)/g, '')] = files(key).default
})

export default modules
modules 폴더 안의 자신을 제외한 모든 js파일을 읽어와 파일명-모듈 쌍으로 객체화해 배포합니다.
[modules/HelloWorld.js]
HelloWorld.vue아님!
경로 : /vuex/modules/HelloWorld.js
/**
 * HelloWorld VUEX sotre 모듈
 * @author WonwooKang
 */

export default {
    namespaced: true,
    state: {
        world: '임시 세계'
    },
    mutations: {
        setWorld: function(state, data){
            state.world = data
        }
    },
    actions: {
    },
}
HelloWorld 전용 Vuex store 객체를 생성하여 배포합니다. 초반에 서술했듯이 namespaced 옵션을 true로 설정하여
commit('helloworld/setWorld')
혹은
this.$store.state.helloworld.world
위와 같이 사용할 수 있습니다. 위의 modules의 분리는 추후 서비스 추가를 대비한 것으로 HelloWrold.js 내용을 store.js 내부에 작성한다면 아래와 같은 모양이 됩니다.
// … store.js 내용 생략

modules: {
        helloworld: {
            namespaced: true,
            state: {
                world: '임시 세계'
            },
            mutations: {
                setWorld: function(state, data){
                    state.world = data
                }
            },
            actions: {
            },
        }
    }

// … store.js 내용 생략
[main.js]
분리가 끝난 main.js
경로 : /src/main.js
import Vue from 'vue'
import router from '../router'
import store from '../vuex/store'

//분리후 매우매우 깔끔해진 main.js
new Vue({
    el: "#app",
    router,
    store,
})
VuexX와 Vue-Router를 모두 분리하고 나니 main.js가 매우 간결해졌군요. 이제 위의 3)에서 다룬 “Vuex store 상태 관리를 통한 HelloWorld”의 Hello.vue와 World.vue의 store경로를 namespace가 적용된 store 경로로 변경합니다.
[Hello.vue]
<template>
    <span>Hello</span>
</template>

<script>
    export default {
        name: "Hello",

        //생성시점에 데이터 세팅
        created: function() {
            this.$store.commit('helloworld/setWorld', 'World')
        }
    }
</script>
commit(‘setWorld’, ‘World’) 에서 commit(‘helloworld/setWorld’, ‘World’) 로
[World.vue]
<template>
    <span></span>
</template>

<script>
    export default {
        name: "World",

        //컴퓨트 속성으로 store에서 world 가져오기
        computed: {
            world: function(){
                return this.$store.state.helloworld.world
            }
        }
    }
</script>
return this.$store.state.world 에서 return this.$store.state.helloworld.world 로
이것으로 확장을 위한 준비가 끝났습니다. 이제 본격적으로 복잡한 3depth 컴포넌트 구조 예제를 작성해보겠습니다.
Vuex store를 활용한 3depth이상의 컴포넌트에서 전체 체크박스 구현
임의의 판매자와 그 판매자의 상품 관리 페이지를 작성하겠습니다. 그리고 최하위 컴포넌트인 상품의 체크박스와 최상위 컴포넌트의 전체 체크박스를 Vuex를 통해 실시간 반응형으로 구현해보겠습니다.
1.라우터에 새로운 서비스 url 추가
[router/index.js]
경로 : /router/index.js
import Vue from 'vue'
import Router from 'vue-router'

//컴포넌트 임포트
import HelloWorld from '../src/components/helloworld/HelloWorld.vue'
import HelloWorld2 from '../src/components/helloworld_with_parentcall/HelloWorld.vue'
import HelloWorld3 from '../src/components/helloworld_with_eventbus/HelloWorld.vue'
import HelloWorld4 from '../src/components/helloworld_with_store/HelloWorld.vue'
import ProductMain from '../src/components/check_itemlist_with_store/ProductMain.vue'

//라우터 사용처리
Vue.use(Router)

//url과 컴포넌트 매핑 name은 router.pust() 메서드 사용시 필요하다.
const routes = [
   // … routes 내용 생략 ...
    {
        path: '/products',
        name: 'ProductMain',
        component: ProductMain
    }
]

//라우터 생성
const router = new Router({
    mode: 'history',
    routes
})

//라우터 배포
export default router
2.전체 체크박스를 포함하는 상품관리 최상위 Vue 컴포넌트 작성
[ProductMain.vue]
경로 : /src/components/check_itemlist_with_store/ProductMain.vue
<template>
    <div class="productListWrap">
        <h4><input type="checkbox" v-model="allProductCheck"/> 전체선택 체크박스</h4>
        <Seller v-for="(sellerItem, index) in sellerList" :key="index" :sellerItem="sellerItem"/>
        <button @click="showCheckedItem">체크된 상품은?</button>
    </div>
</template>

<script>
    import Seller from "./Seller.vue";

    export default {
        name: "ProductMain",
        computed: {
            //조회된 판매자 목록
            sellerList: function(){
                return this.$store.state.product.sellerList
            },
            //전체선택 여부 및 설정용
            allProductCheck: {
                //모든상품이 선택됬는지 리턴
                get: function () {
                    let sellerList = this.$store.state.product.sellerList;
                    let productCount = 0;

                    //각셀러의 상품수
                    for (let i = 0; i < sellerList.length; i++) {
                        productCount += sellerList[i].products.length
                    }

                    //상품수와 상품번호의 수가 같은지
                    return productCount === this.$store.state.product.checkedProductIds.length
                },
                //모든상품이 선택되도록 처리
                set: function (isChecked) {
                    this.$store.commit('product/checkAllProduct', isChecked)
                }
            }
        },
        created: function() {
            //생성시 vuex를 통해 판매자 목록 조회 요청
            this.$store.dispatch('product/getSellerList')
        },
        methods: {
            showCheckedItem: function(){
                if (this.$store.state.product.checkedProductIds.length != 0) {
                    alert('체크된 상품번호는 ' + this.$store.state.product.checkedProductIds.toString())
                } else {
                    alert('체크된 상품이 없습니다.')
                }
            }
        },
        components: { Seller }
    }
</script>

<style scoped>
    h4 { border: solid 1px black; padding: 10px; }
    button { margin-top: 10px; width: 200px; height: 40px; font-weight: bold; }
</style>
최상위 컴포넌트로 판매자의 목록을 v-for를 통해 화면에 표시합니다. 또한 Vuex Store의 체크된 상품목록을 computed 속성으로 v-model에 바인딩하여 화면이 반응하도록 제작했습니다.
3.ProductMain.vue 하위의 판매자 Vue 컴포넌트
[Seller.vue]
경로 : /src/components/check_itemlist_with_store/Seller.vue
<template>
    <div class="sellerWrap">
        <h3></h3>
        <SellerProductItem v-for="(productItem, index) in productList" :key="index" :productItem="productItem"/>
    </div>
</template>

<script>
    import SellerProductItem from "./SellerProductItem.vue";

    export default {
        name: "Seller",
        props: {
            sellerItem: Object
        },
        computed: {
            productList: function() {
                return this.sellerItem.products
            }
        },
        components: { SellerProductItem }
    }
</script>

<style scoped>
    .sellerWrap { border-bottom: 1px solid #000000;}
</style>
ProductMain.vue에서 넘겨받은 SellerItem 의 products를 v-for에 넘겨 화면에 상품을 그리는 2depth 컴포넌트입니다.
4.Seller.vue 하위의 상품 VUE 컴포넌트
[SellerProductItem.vue]
경로 : /src/components/check_itemlist_with_store/SellerProductItem.vue
<template>
    <div class="productWrap">
        <input type="checkbox" v-model="productCheck"/>
        <img :src="productItem.image"/>
        <div class="info">
            <h3 class="productName"></h3>
            <span>상품번호: </span><br>
            <span>가격: </span>
        </div>
    </div>
</template>

<script>
    export default {
        name: "SellerProductItem",
        props: {
            productItem: Object
        },
        computed: {
            productCheck: {
                get: function(){
                    let productIndex = this.$store.state.product.checkedProductIds.indexOf(this.productItem.id)
                    return  productIndex !== -1
                },
                set: function(isChecked){
                    let data = {
                        id: this.productItem.id,
                        isChecked: isChecked
                    }

                    this.$store.commit('product/productCheck', data)
                }
            }
        },
    }
</script>

<style scoped>
    .productWrap { height: 120px; margin: 10px; margin-bottom: 10px;}
    .productWrap .info { display: inline; height: 120px; vertical-align: middle; float: left; margin-left:20px; }
    .productWrap .info .productName {}
    .productWrap input[type=checkbox] { float: left; width: 30px; margin-top: 50px; margin-right: 10px;}
    .productWrap img { width: 120px; float: left;}
</style>
ProductMain>Seller 하위의 3depth 상품 컴포넌트로 각 상품의 체크박스는 computed속성을 v-model에 바인드합니다. 그리고 get()함수에서 체크된 상품번호 배열에 자신이 있는지 없는지 여부를 리턴합니다.
set() 함수는 체크여부가 true일 때 체크된 상품번호 배열 자신을 등록하고, 체크여부 false일 때 자신을 배열에서 제외시키도록 작성되었습니다.
5.상품 상태 관리 store 작성
API 서버가 따로 없기 때문에 데이터 베이스를 흉내낸 2차원 배열을 선언하여 마치 데이터 베이스를 조회하는 것처럼 예제를 작성했습니다.
[Product.js]
경로 : /vuex/modules/Product.js
/**
 * Product VUEX sotre 모듈
 * 상품 관리 store
 * @author WonwooKang
 */

//첫번째 판매자의 상품
let firstSellerProductList = [
    {id: "10001", name: "꿀벌이 열심히 모아온 화분 (200g)", price: 7500, image: '/images/product_01.jpg'},
    {id: "10002", name: "고소한 피스타치오 250g", price: 5500, image: '/images/product_02.jpg'},
]

//두번째 판매자의 상품
let secondSellerProductList = [
    {id: "20001", name: "톡쏘는 발포 비타민C 20개입", price: 6000, image: '/images/product_03.jpg'},
    {id: "20002", name: "싱싱한 왕란 30구 한판", price: 4500, image: '/images/product_04.jpg'},
]

//서버에서 받아오는 정보를 흉내낸 판매자 배열
let sellerList = [
    {name: "플라워파우더", products: firstSellerProductList},
    {name: "비타민", products: secondSellerProductList}
]

export default {
    namespaced: true,
    state: {
        sellerList: [],
        checkedProductIds: []
    },
    mutations: {
        setSellerList: function (state, data) {
            //데이터 적용
            state.sellerList = data
        },
        //개별 상품 체크
        productCheck: function (state, data) {
            let checkedIndex = state.checkedProductIds.indexOf(data.id)

            if(data.isChecked) {
                if (checkedIndex === -1)
                    state.checkedProductIds.push(data.id)
            } else {
                if (checkedIndex !== -1)
state.checkedProductIds.splice(checkedIndex, 1)
            }
        },
        //상품 전체 체크
        checkAllProduct: function (state, isChecked) { //모든 상품번호 체크목록에 등록

            if (isChecked) {
                for (let i = 0; i < state.sellerList.length; i++) {
                    let seller = sellerList[i]

                    for (let j = 0; j < seller.products.length; j++) {
                        let product = seller.products[j]

                        if (state.checkedProductIds.indexOf(product.id) === -1)
state.checkedProductIds.push(product.id)
                    }
                }
            } else {
                state.checkedProductIds = []
            }
        }
    },
    actions: {
        getSellerList: function (context) {
            //서버와 통신 후 리턴받은 데이터를 mutation에 전달
            //서버 통신부분은 위의 임시 배열로 대체합니다.
            context.commit('setSellerList', sellerList)
        }
    },
}
actions에서 조회된 데이터는 context.commit을 통해 mutations를 트리거하고, mutations를 통해 sellerList state를 변경합니다.
또한 ProductMain과 SellerProductItem 컴포넌트에서 commit을 통해 상품의 체크여부를 등록 제거할 수 있는 mutations들도 구현되어 있습니다. productCheck()와 checkAllProduct()처럼요. 자, 이제 각각의 체크박스가 유기적으로 잘 작동하는지 확인해봅시다.

접속하면 ProductMain.vue의 getSellerList dispatch로 판매자의 상품 목록이 불려와 화면에 뿌려진 모습입니다. 두 개의 상품을 선택한 후 체크된 상품 확인 버튼으로 잘 등록됐는지 확인해보겠습니다.
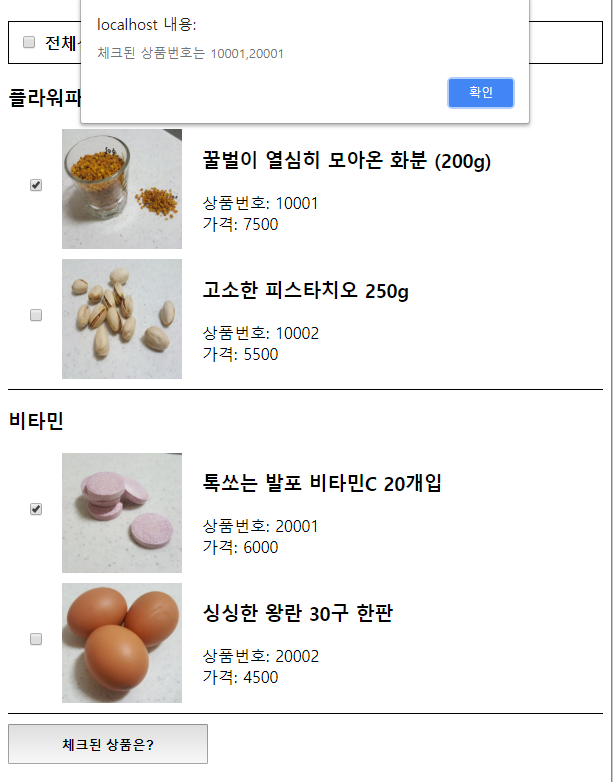
체크하면 checkedProductIds 배열에 정상적으로 상품 ID가 등록된 것을 확인할 수 있습니다. 그렇다면 각 상품의 체크박스와 전체 체크박스가 유기적으로 동작하는지 확인해봐야겠죠? 나머지 각 상품의 체크박스를 클릭해 전체 체크박스가 자동으로 체크되는지 확인해보겠습니다.
전체 체크박스를 클릭하지 않아도 모든 상품이 체크되면 자동으로 전체 체크박스에 체크 표시가 들어오며 유기적으로 작동하는 모습을 확인할 수 있습니다.
Conclusion
지금까지 Vuex를 통해 v-model로 바인딩된 체크박스로 체크 상태 여부를 관리하고, productIds를 바라보고 있는 v-model의 get 메서드로 즉각적으로 반응하는 체크박스 처리에 대해 알아봤습니다.
만약 이것을 이벤트 버스나 상위 컴포넌트로 제작했다면, 체크박스의 상태가 바뀔 때 발생하는 이벤트, 또 그에 따른 전체 체크박스의 변화를 고려한 이벤트, 각 체크박스의 체크 여부를 확인하기 위한 데이터 동기화 등등 숨도 쉬지 못할만큼 많은 사항을 고려해 제작해야만 합니다.
하지만 Vuex를 활용하면 머리 아프게 모든 상황을 예측해 제작할 필요가 없고, 이벤트도 따로 핸들링할 필요도 없습니다. Vuex의 state에 Mutation(변이)만 해주면 알아서 컴포넌트들이 반응하니까요! 정말 심플하죠.
“이번엔 어떤 이름으로 이벤트를 트리거 할까.”
“이 이벤트명 쓰는 녀석이 또 있던가?”
이런 복잡하고 머리 아픈 고민을 끝내고 Vuex를 씁시다. 두 번 씁시다.
참고
작성된 코드는 여기에서 확인할 수 있다.
강원우 | 커머스 개발팀
kangww@brandi.co.kr