Let’s use open source library, CocoaPods! (ENG)
Survive as an iOS Junior Developer #2
김주희
2018-03-19
Overview
During development, whenever developing a complicated functions or the source code is getting longer and massive, we often use open source libraries. Because it’s easy to use and makes what we want to feature in our app function well. So how do you bring an open source library into the app and use it? By using ‘CocoaPods’.
What is CocoaPods?
The official website of CocoaPods introduces the CocoaPods as follows :
“CocoaPods is a dependency manager for Swift and Objective-C Cocoa projects”
In other words, CocoaPods is an environment or a tool to link open source libraries with our project, so we could use and manage it. It has many advantages. First, we can manage adding, removing, updating dependencies(libraries) used in our app. For instance, we can make our own networking library, but CocoaPods can link our app with Alamofire dependency to use networking functions.
Second, we can specify the dependency version we want to use in our app. Even if the new update version of the dependency comes out, we can still use the version we set up until we are ready to use the new version.
How to use Cocoapods?
1.Install CocoaPods
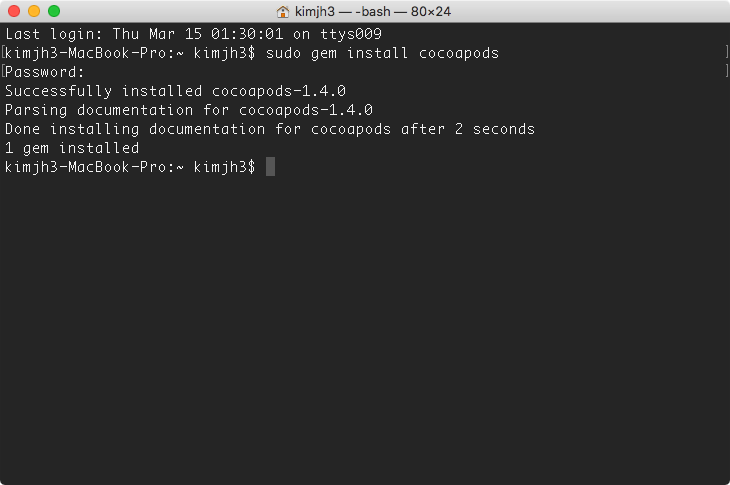
If you found an open source library to use with your app, let’s link it by using CocoaPods. First, open the ‘Terminal’ program and enter the following command to install CocoaPods.
$ sudo gem install cocoapods
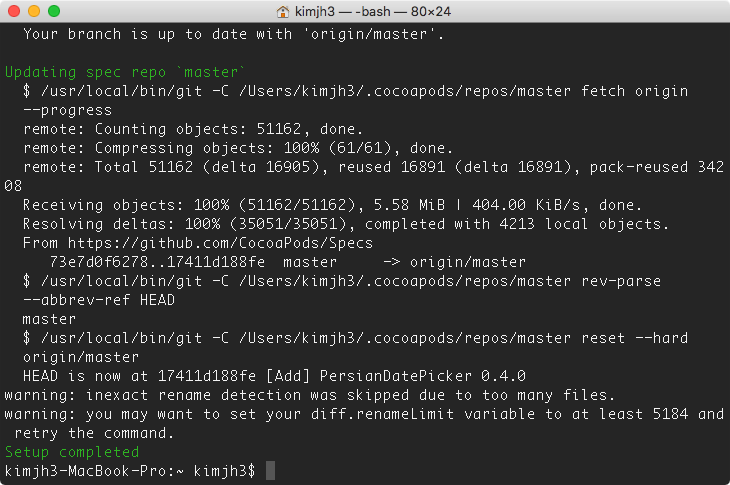
And then download the Podspec file from the CocoaPods Master Specs repository to your computer. Use the –verbose command to view the current progress at the terminal.
$ pod setup --verbose
Now you are ready to use CocoaPods. Create a simple project in Xcode and quit. In this article, we will make an app that shows a list of tourist attractions.
2.Link Library
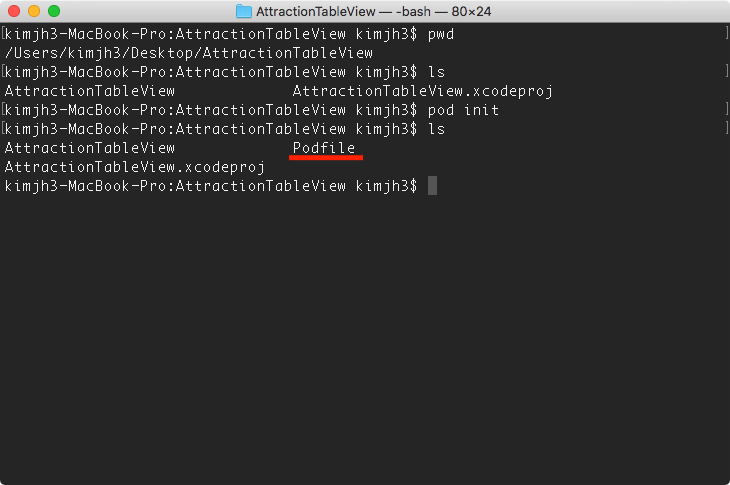
Using terminal program, go to the project path that you just created, and then create Podfile to set up the library required for the app. There are two ways to make Podfile. One way is using the ‘pod init’ command to force the CocoaPods to create a file with a default frame. Another way is creating a blank file and set it all by yourself. Let’s use the ‘pod init’ command. (It’s convenient)
$ pod init
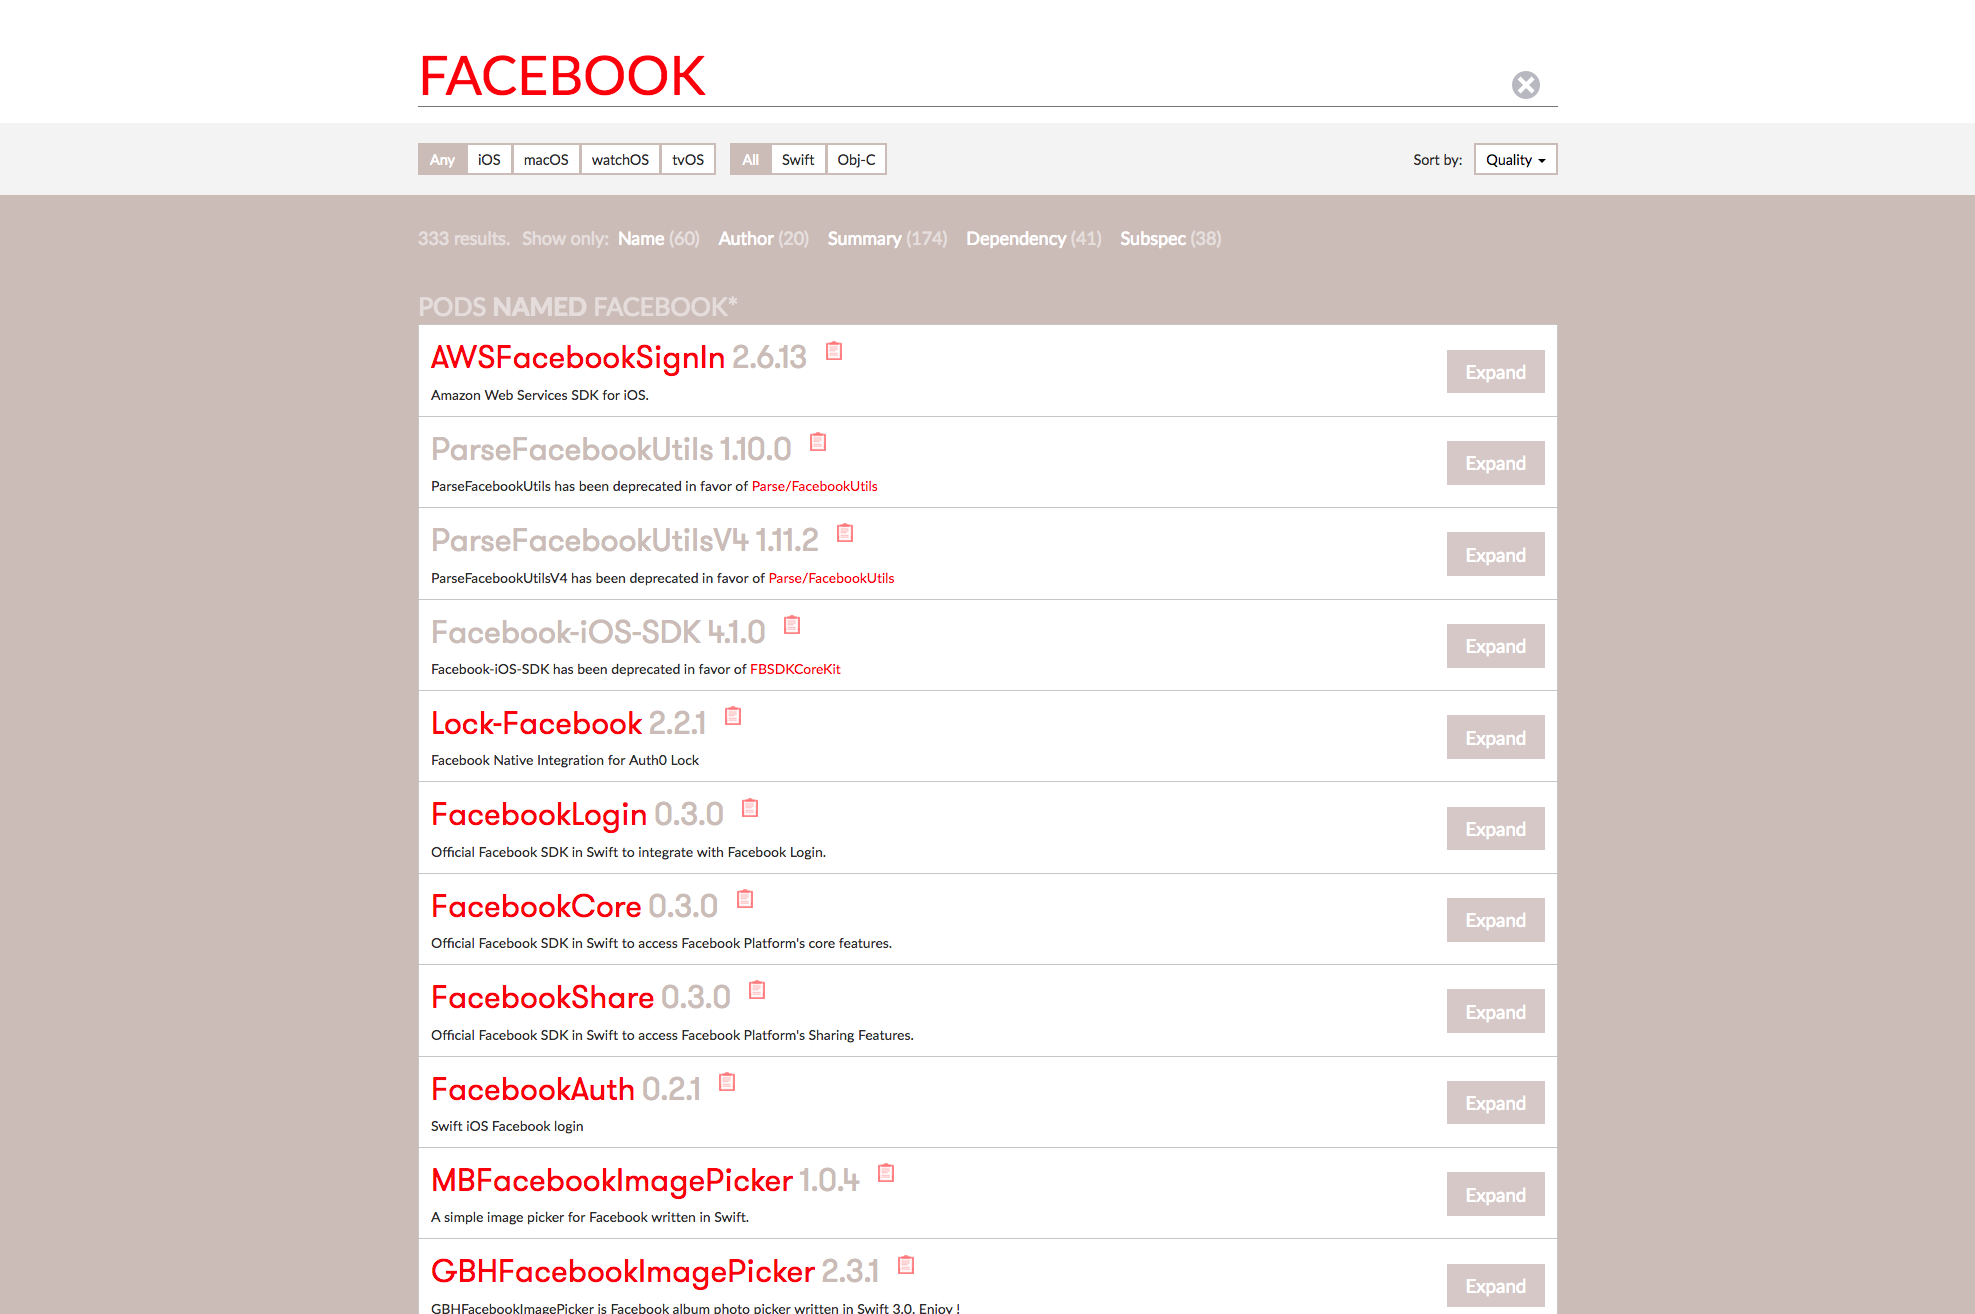
Now go to the CocoaPods website to find the library we want to set up. Browse the library you want to use and place the mouse pointer on the clipboard icon next to the library name. A text that you can copy will show up. Copy that and paste it to the Podfile and save. We’re going to use the SDWebImage library to handle the images with using URL address.
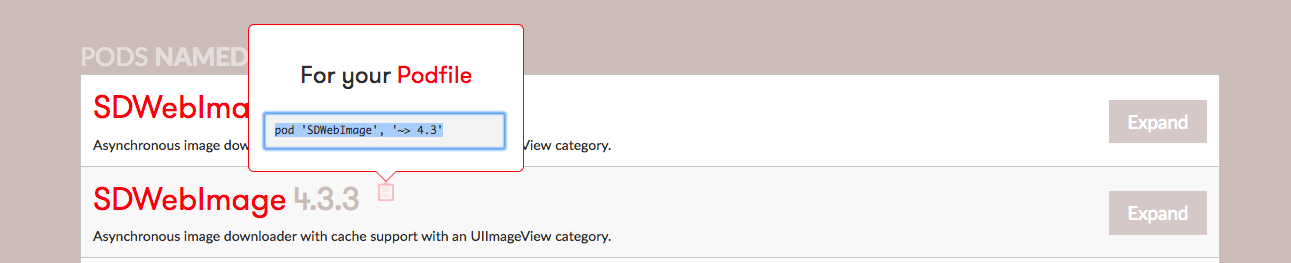
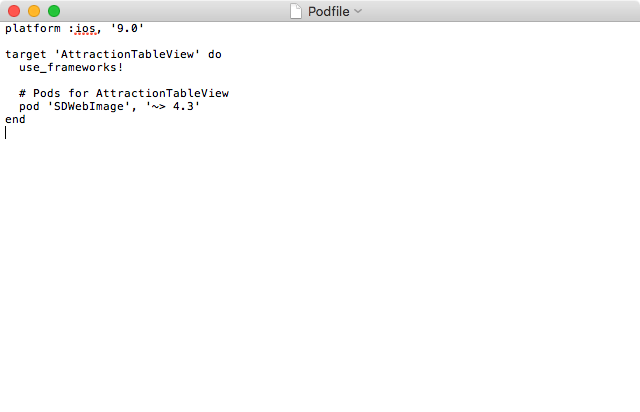
To briefly describe Podfile above, the project’s distribution target is iOS 9.0. The ‘use_frameworks!’ is a sentence that you must add if you are going to add a library that is written in Swift and to use frameworks. The numbers next to the library mean we are going to use the library version 4.3 and before 4.4. With the minimum settings, save the Podfile and run the following command :
$ pod install --verbose
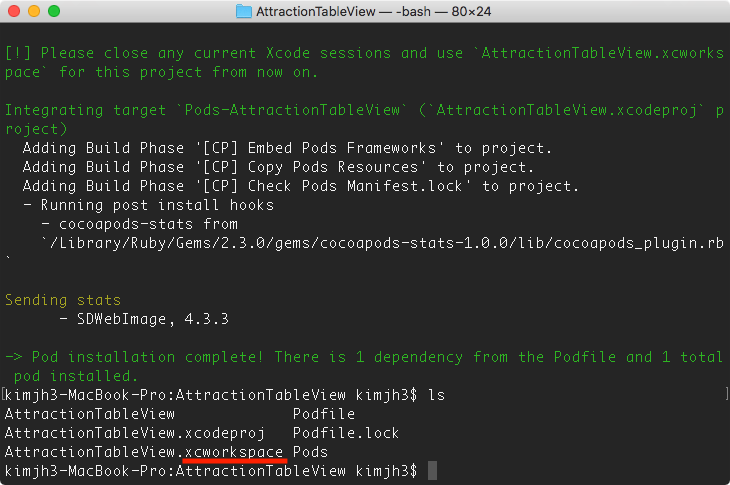
When pod installation is completed, you can see that the xcworkspace file has been created. Xcworkspace file is a collection of projects. It combines the original project which we created before, and the Pods project that allows us to manage the libraries. The original project relies on the pods project. So when you open the xcodeproj file, Xcode does not have the information (or does not find it) about the libraries that are connected, as a result it shows errors to us. Therefore, after installing pods with CocoaPods, you must open the xcworkspace to develop with the connected libraries.

3.Using the Library
Now let’s try using the library that you have connected to.1) In the example, we will add a code using SDWebImage library to set up an image in ImageView with a URL image address.
By using UITableViewController, we will display a list of tourist attractions with name, description, and images. Create a data model of tourist attraction and design the app at the interface builder. Open the view controller file to import the library to do the work. First, enter the import command to connect the library to this source.
AttractionTableVC.swift

import SDWebImage
Add a code for the tableView(tableView:cellForRowAtIndexPath:) function as shown below. 2)
override func tableView(_ tableView: UITableView, cellForRowAt indexPath: IndexPath) -> AttractionTableViewCell {
        // Table view cells are reused and should be dequeued using a cell identifier.
        let cellIdentifier = "AttractionTableViewCell"

        guard let cell = tableView.dequeueReusableCell(withIdentifier: cellIdentifier, for: indexPath) as? AttractionTableViewCell else {
            fatalError("The dequeued cell is not an instance of AttractionTableViewCell.")
        }

        let attraction = attractions[indexPath.row]

		// . . .

		cell.attractionLabel.text = "\(indexPath.row). \(attraction.nameWithDescription)"
        cell.attractionImage.sd_setImage(with: attraction.photoURL, completed: nil)

		// . . .

        return cell
    }
The reason why I use SDWebImage library, is that I wanted to show the tourist attraction image using the URL image address. However, URL address were not immediately available for UIImage, and had to be converted to Data format to use it. If you don’t use the library, you would have to write the following code :
// return UIImage which is set from url data
    private func imageFromUrl(url: URL) -> UIImage {
        var photo = UIImage()

        do {
            let imageData = try Data.init(contentsOf: url)
            photo = UIImage(data: imageData)!
            return photo
        } catch {
            print(error.localizedDescription)
            return photo
        }
    }
However, with the SDWebImage library, you can reduce the code created above to only one command :
cell.attractionImage.sd_setImage(with: attraction.photoURL, completed: nil)
Source length is significantly reduced. In addition, access the SDWebImage Library GitHub page to see more features like GIF support, asynchronous image downloader, and more.
CocoaPods Error
After cloning the ‘Brandi’ app project and working with it, I often get some errors related to CocoaPods. Let me introduce some solutions to errors.
1.
“/Applications/Xcode.app/Contents/Developer/Platforms/iPhoneOS.platform/Developer/SDKs/iPhoneOS.sdk/usr/include/sqlite3.h” not found”
-> Most errors are resolved almost entirely by reinstalling the CocoaPods.
$ sudo gem install cocoapods
$ pod install –verbose
2.
“Could not build module firebase core” Error
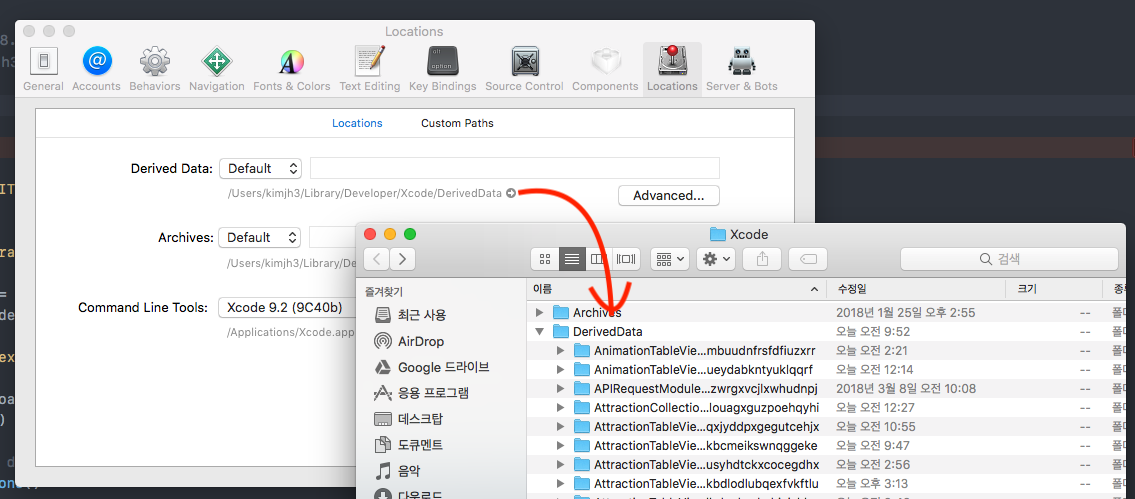
-> Delete project’s temp file (~/Library/Developer/Xcode/DerivedData — located at : Xcode->Preference->Location)
First, find the folder path above and open it in Finder. Next, you need to close the Xcode and safely delete it.
-> Delete ProjectName & .xcworkspace
-> Delete both Podfile.lock file and Pods folder
-> $ pod install –verbose
-> Run the newly created ProjectName.xcworkspace and rebuild
-> But still doesn’t work?
—> $ pod update or $ pod –version or $ pod repo update
—> Comment the pod ‘Firebase’ line at Podfile
—> $ pod install (old Firebase will be erased)
—>Add the pod line ‘Firebase’ again
—> $ pod install (new Firebase will be installed)
—> Resolved!
Conclusion
Now when it comes to developing new features or modifying sources, find any library from the CocoaPods that is relevant. If you found the best library, you can immediately apply it to your project. While it’s a good idea to write your own function or library by yourself, it’s also good to use convenient tools to improve your work. Have you found a library you like? Tell me about it. Congratulations on becoming an iOS developer using the CocoaPods!
▶︎한글 원문을 보려면 여기를 클릭하세요.
Comment
1) Each library’s GitHub page contains detailed ways how to install it.
2) The tourist attraction data are stored in the attractions array. Set it up for each table view cell using one of the tourist attraction data selected in the array. Here, we are going to set image with URL address to attractionImage(UIImageView) in the Table View Cell.
Reference
- swift3 - Error: Could not build Objective-C module ‘Firebase’ - Stack Overflow
- Google Groups
- An Introduction to CocoaPods (Route 85) - YouTube
김주희 | MA팀
kimjh3@brandi.co.kr